The Thin Man
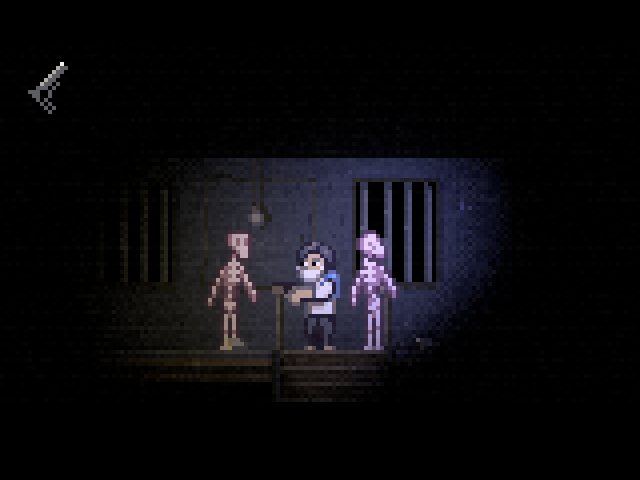
You find yourself in troubled waters…
Archive for the ‘ games ’ Category

You find yourself in troubled waters…
This is the fun part I’ve been waiting for, and slogging through all the nasty bits for… It’s time to make the game proper! Now I can enjoy the rest of the project a great deal more because it’s all about:
– making graphics
– making sound and music
– making levels
These parts are why I make games – programming and engines are all a means to an end – and I’m pleased to discover that the engine is adapting well to having lots of shiny new content thrown at it.
In that sense I really feel like I achieved my goal of reducing all the bullshit you have to do to get stuff into the game – it’s now just a case of coming up with the creative stuff, and getting it in there is [almost] pleasurable with the editor.
So far there’s heaps of new locations, sound and animation – but I’m going to hold off on releasing any more demos until I reach the closed beta stage.
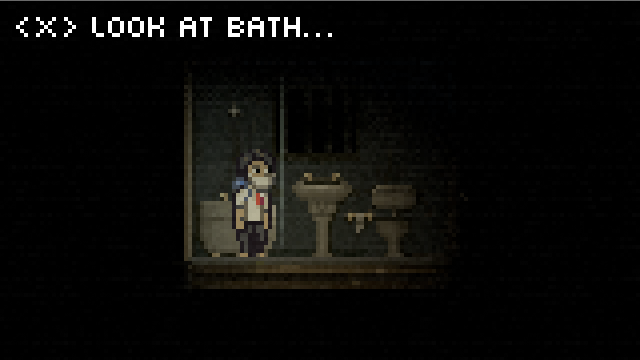
I’ll leave you with a new screenie – recalling Soundless Mountain II in some ways (I like bathrooms, what can I say?)
In other news, there could be some wonderful things about to happen with Superflat Games – I will tell more when it’s confirmed – but suffice to say things could get quite a bit more serious in the coming months…
Lone Survivor – version 0.32 [Play online]
NOTE: This game contains explicit language. It’s recommended you close all other flash windows, including Youtube, for the best performance. Please note also that this is just a tech demo, and in no way shows the level of polish of a final game!
EDIT: The link now contains version 0.32, which improves flashlight, fixes a couple of bugs, and adds smooth room transitions, and lastly adds movement to points of interest automatically.
Update
I’ve linked to a new version of this, which is now running in the new version of the engine, which is close to complete.
Before, all the game objects such as the player were hard-coded in Actionscript using the Flixel framework.
Now instead, every game object is exactly the same thing as far as Flixel is concerned, except they run their own setup and logic routines which are all powered by the HAL parser (HAL is the name I’ve given to my script language). The player is slightly special in that it persists between rooms.
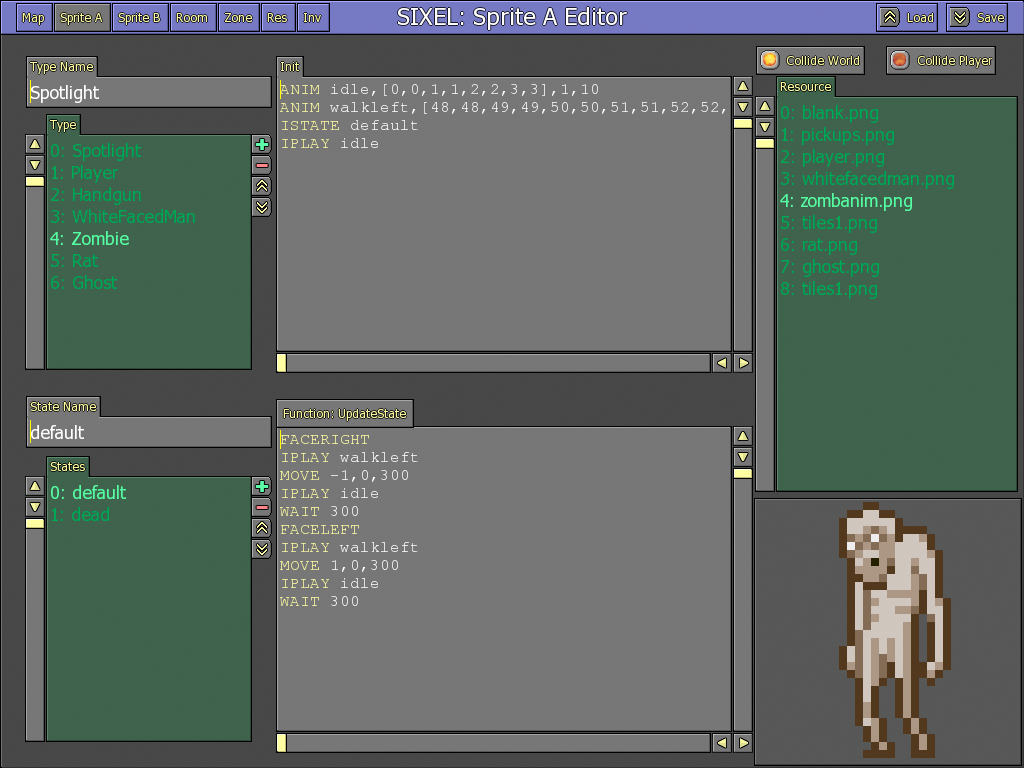
Also the assets are now handled in the editor (graphics and sound etc)… You just plonk one in the resource folder, and they appear in the editor. They’re automatically embedded into the Flixel code, so I never need to re-write it once it’s done. I hate manually typing in asset names!
I’ll probably write more about how my editor works at some point – it’s something I’ve worked on for a long time, and it’s just getting to a fairly usable state. There’s still work to do, but it’s almost possible to get a fully working adventure game out of it now. The last step is inventory handling, and I’ve got a plan for it, let’s hope it doesn’t take too long!
Here are links to a couple of games I never finished…
Trip:One
Controls:
L/R: Turn

U/D: Thrust / Reverse
X: Ok / Primary Item

C: Cancel / Back / Secondary Item
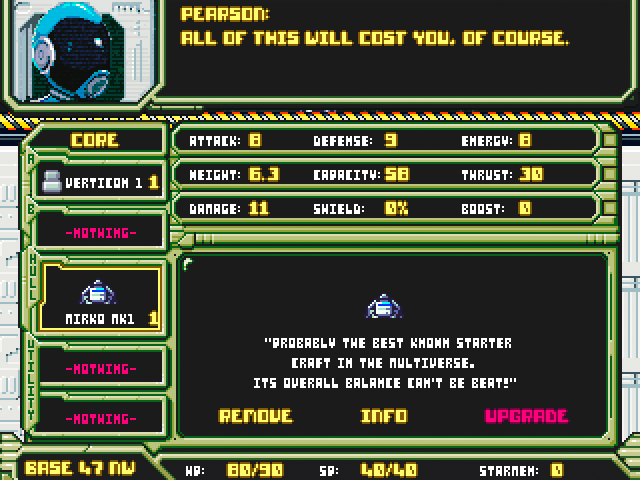
ENTER: Bring up upgrade screen (can only upgrade when parked on top of the dropship).
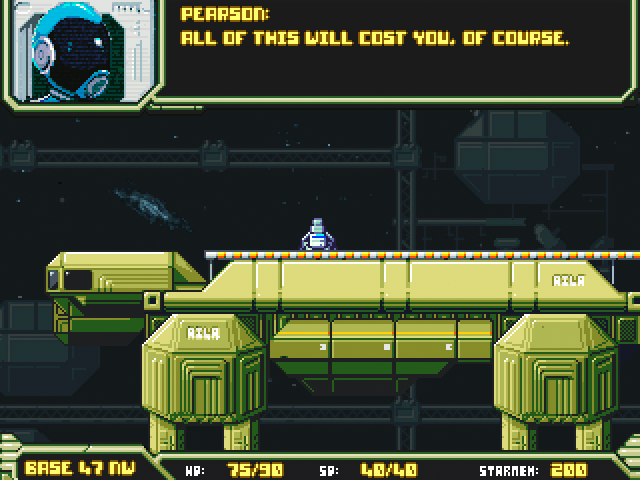
HP is your ship’s shield. You can get it back by sliding on striped surfaces.
SP is your ship’s energy, and you won’t be able to use items (such as guns / shield) unless you have some. It replenishes over time.
Notes:
You can hold the X button to get rid of all the text. I’d recommend doing it first. I meant to improve the textbox system so they were more like auto-popups as in Starfox.
I had planned to make the inventory screen so you could actually swap between items when away from the dropship. Won’t probably get round to it now.
There’s quite a few items to be found. You can upgrade them or your ship by collecting starmen, which are used as currency.
If you die, you drop your starmen, and if you don’t then make it back to where you snuffed it, you’ll lose them forever. In general it’s best to upgrade as soon as you can (such as at the start, because you begin with 200 or so starmen).
* * *
Soul Brother
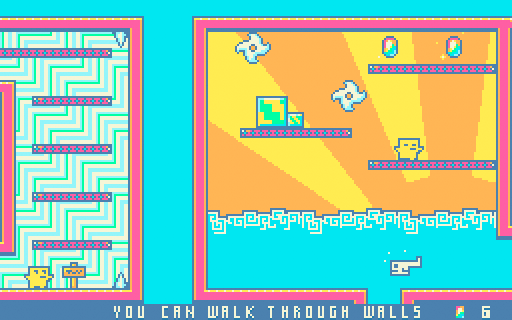
There is actually a version 0.6 around which has quite a lot more in it as well as bugfixes. I will definitely post this at some stage soon. Just needs packaging up!
Controls:
L/R: Move
X: Ok / Use / Unique Move (such as Fly / Jump etc)

C: Cancel / Back
In other news, I can finally announce the game I’ve been designing in my day-job:

As it’s finally been announced at E3, I guess it’s ok for me to say. It doesn’t get much more mainstream than this, folks!
Oh dear god, why is this the only game I’ve made in six months…

Download for Mac
Download for PC
Thanks to the wonderful Terry Cavanagh for his far superior Maverick Bus.
If that means nothing to you, you might as well browse on… Geekspeak ensues! If it does, welcome to my short tutorial on what I last posted about, and specifically how to plug Pixel Bender filters into Adam Atomic‘s wonderful Flixel framework for Flash. Also apologies for the temporary blog theme, as I managed to screw up my previous stylesheet with no backup. Will do something when I have more time, I promise!
Anyway, I’ll leave the Pixel Bender Toolkit stuff itself to other people (there’s loads of tutorials and free sample code for writing the filters themselves…)
Just remember to alter your project properties to build for at least Flash Player 10 0 0 (right click on the project icon in the project explorer and choose Properties, you’ll find the setting in the Actionscript Compiler area, where you set your Flex SDK.)
Once you’ve created your compiled ‘.pbj’ filter in the Toolkit (from a ‘.pbk’, the code file), and stuck it somewhere suitable like your ‘data’ directory, the main problems I had were how to:
1. Load the filter in Flixell
You’ll need these includes:
import flash.display.Shader;

import flash.filters.ShaderFilter;
Make sure to use ‘octet-stream’ encoding. Embed it as a Class:
[Embed(source = "/../data/filter.pbj", mimeType = "application/octet-stream")] private var FilterCode:Class;
…and plug it into the Shader() constructor:
var coolShader:Shader = new Shader(new FilterCode());
2. Access your filter’s paramters:
You can access any of the parameters you defined in Pixel Bender toolkit like this:
coolShader.data.paramName.value
(*paramName being your parameter name, not the word paramName!)
Important to note that even if the parameter is a single float, you must pass the Shader a one-parameter array. So for example, my light position, which is a float3 of x,y and z would be accessed as follows:
coolShader.data.lightPosition.value=[x,y,z];
coolShader.data.lightAttenuation.value=[1.0];
3. [Optionally] Add additional inputs to the filter (by default, the input is also the output, but what if you need a fog texture, for example…)
Just refer to it as you would a parameter, only pass BitmapData in, and use the ‘input’ property instead of the ‘value’ one:
coolShader.data.fogMap.input = FlxG.addBitmap(ImgFog,false);
Obviously if your PB filter doesn’t need a second input (like a desaturation filter, for example), you can skip this step. Make sure you name your input the same as the input parameter in your PB code.
4. Apply the filter to the buffer
The Pixel Bender shader itself has to be wrapped up in a way Flash can understand. This is what the ShaderFilter class is for. You create one by passing the Shader to it. Add this to your setup code:
var coolFilter:ShaderFilter = new ShaderFilter(coolShader);
And then you can apply this filter as you would a normal Flash filter, and there are three ways to do this. I’m actually using the supposed slowest of the three apparently, but it seems to be the fastest in my results!
In your ‘PlayState’ add the following to an overridden postProcess() function:
FlxG.buffer.applyFilter(FlxG.buffer,new Rectangle(0,0,screenWidth,screenHeight),new Point(0,0),coolFilter);
The point is for the top-left, and the rectangle just specifies the bounds.
NOTES:
If you only want to store one reference, and aren’t switching shaders on an object, you can actually access the Shader parameters through the ShaderFilter, like so:
coolFilter.shader.data.fogMap.input = FlxG.addBitmap(ImgFog,false);
I’ve experimented with adding the filter in this way too, just like Flash’s in-built filters:
myGameState.filters=[coolFilter];
In Flixel, this works but operates on the post-transformed pixels (ie post-Flixel-scaling), whereas applying it to the BitmapData in postProcess() is pre-scale.
Make sure you don’t include loops in your .pbk code as they’re not supported in Flash, and avoid conditionals where possible, especially when sampling a texture within one.
BIG QUALIFIER:
I’m a pretty crappy coder, and have never posted this kind of thing before. Hope it was in some way helpful! Feel free to point out any errors which there are no doubt quite a few of… Thanks also to others who paved the way for this tutorial such as Salt and various other helpful bloggers.
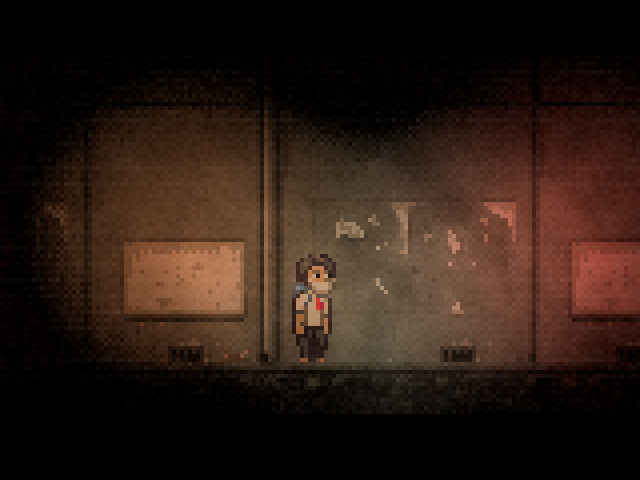
Lone Survivor v0.2 – [Play Online]
NOTE: It’s recommended you have no other Flash windows running to see good performance.
So, just say I was going to re-build my survival horror engine (as seen in Soundless Mountain II) in Flash…
To re-create the lighting / fog / film-grain effects, I’d probably need to harness the power of Flash 10.0’s all new ‘Pixel Bender’ tech. This is like having programmable PS3-style shaders at your disposal. At the moment it runs in software, but it’s still faster than pure Actionscript 3 (Flash language).
From the research I’ve done on the net, no-one’s combined this tech with pixel art as yet (partly because it’s fiddly to set up I think, and it’s so new) – so let me know how it runs for you.
Press A/Z to move the secondary lights. Press Left / Right to move your player – there’s no walk cycle yet though!
The reason I’m posting is that I’d love to know what framerate you’re seeing, and your specs – press the ‘|’ key or the ‘¬’ depending on your machine to bring up the console and see your framerate.
Thanks in advance!
Hello, world!
Just a very quick note to say that the homepage has been uploaded, a year or so late… Have fun with it, and maybe discover something you had missed!
I’m in the process of writing ‘Gamepages’ for every one of them, so the frontpage links to them (I’ve done Soundless Mountain II as an example, which you can see on the sidebar of this blog). At the moment, they just link to the nearest way to find the game.
Anyway, take a look, and leave any feedback here. I’ll also try and give this place a makeover soon, so any suggestions would be great.
Thanks!
Jasper ‘superflat’ Byrne and Bento Smile Present:
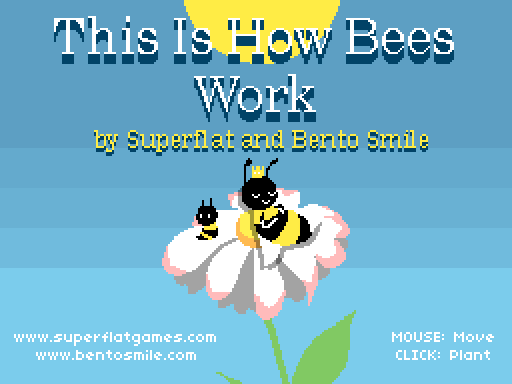
“This Is How Bees Work”
This work aims to be a factual documentary, explaining to young and old alike exactly how the mysteries of nature unfold.
Please enjoy and learn something at the same time. Thankyou!
Download [OSX / PC]: /This-Is-How-Bees-Work.zip [4.4mb]
This is the finished version of the game. We may add more at a later date, but there’s already quite a lot to discover…
Before I bring you up to date with thing, and by way of apology for said tardiness, let me present this short ‘game’ I made a TIGJam UK2, a gathering of fine indie-gaming folk here in my native Cambridge, last night:

BEEEEEEEEEEEEZZZZZZ!
– by Jasper ‘superflat’ Byrne & ‘Bento Smile’
Oh, and that’s 12 E’s, and 6 Z’s, in case you were wondering…
Download: BEEEEEEEEEEEEZZZZZZ! (alpha 0.2) [OSX / PC]
Play with your mouse!
My good friend Bento Smile contributed the pretty flowers, and may add more foliage at a later date. I will put some sound in at some point, and perhaps even a goal. For now I quite like it for what it is.
Yes, things have actually been going on in my lengthy absence from this blog. My beautiful girl, Aila, was born on the Dec 26th. Her mother, Kanako, and I are very happy!

And I’ve been working on a brand new, completely unrelated-to-Amnesia/iLoveWar/Soul Brother game, but which is somewhat related to my earlier game, Trip.
It’s called Trip:One, and the best way I can describe it is a mash-up of gravity gun-em-up and Demon’s Souls-style hardcore, never-die-or-you-lose-it-all gaming.
I hope you’ll like it when I eventually show it – it’s being done in Actionscript 3 and runs in a browser, which is a departure for me – I normally go for the immersion of full-screen games. I want it to be something people spend their lunch hours on though, and this is a great way to reach them. For now, I’ll leave you with this screenie:
| M | T | W | T | F | S | S |
|---|---|---|---|---|---|---|
| 1 | 2 | 3 | 4 | |||
| 5 | 6 | 7 | 8 | 9 | 10 | 11 |
| 12 | 13 | 14 | 15 | 16 | 17 | 18 |
| 19 | 20 | 21 | 22 | 23 | 24 | 25 |
| 26 | 27 | 28 | 29 | 30 | 31 | |